
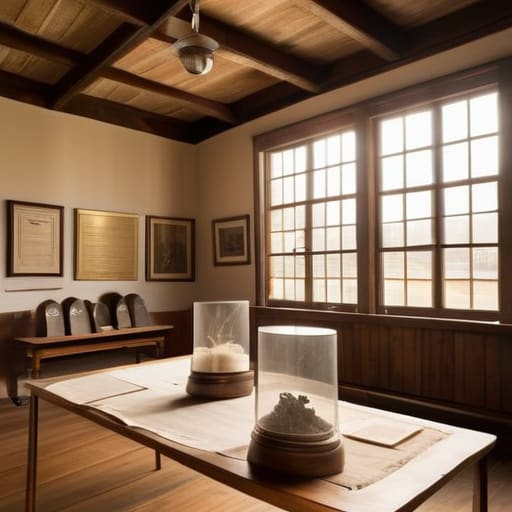
I remember sitting in a drafty church hall back in ’98, surrounded by three dozen dusty boxes of old photographs and a committee that couldn’t agree on whether to serve tea or coffee. Everyone was talking about “curatorial vision” and “high-concept immersive experiences,” but nobody could tell me where the spare keys were kept or how we were going to pay for the trestle tables. Most people think that learning how to run a history exhibition requires a massive grant and a degree in museum studies, but that’s just a recipe for expensive stagnation. In my thirty years in local government, I’ve seen more wonderful projects die from lack of a simple filing system than from a lack of funding.
I’m not here to give you a lecture on academic theory or tell you to hire a professional consultant. Instead, I’m going to show you how to get those six essential people in a room, secure a bit of capital, and actually make something happen. I will share the practical, unvarnished truth about managing the paperwork, the people, and the pennies so that your community’s stories don’t just sit in a box, but actually get seen.
Understanding How to Run a History Exhibition

Now, before you start dragging dusty boxes out of people’s attics, you need to understand what you are actually trying to achieve. A history exhibition isn’t just a pile of old photographs dumped on a trestle table in a drafty church hall. If you want people to actually stop and look, rather than just walking past to get to the tea and biscuits, you need a bit of a plan. It comes down to exhibition storytelling techniques—you aren’t just showing objects; you are telling the story of the people who lived on your street.
I’ve seen so many lovely projects stumble because they jumped straight into the doing without the thinking. You need to decide early on what your “narrative” is. Are you tracing the change in local industry, or is it more about the domestic lives of families through the decades? Once you have that thread, the curating of historical artifacts becomes much easier because you know exactly what belongs and, more importantly, what doesn’t. It’s better to have ten meaningful items that tell a clear story than fifty bits of bric-a-brac that just create clutter.
Key Things to Know
First, you have to realise that you aren’t just putting old photos on a noticeboard; you are curating historical artifacts with a sense of purpose. I’ve seen too many lovely projects fizzle out because people treated the items like clutter rather than treasures. You need to treat every scrap of paper or rusted tool as a piece of a larger puzzle. If you don’t have a clear narrative, people will just walk past the displays without a second thought.
Secondly, don’t underestimate the sheer amount of legwork involved in the archival research for displays. It isn’t just about finding the “what,” it’s about finding the “who” and the “why.” I spent years in local government seeing how a single well-documented story could transform a community’s sense of pride. You want your neighbours to see an object and recognise their own grandfather’s hands in it. That connection is what makes the difference between a dusty room and a living history. Keep your notes tidy from day one—trust me, you’ll want them when the next committee takes over.
Practical Tips and Steps

First, don’t try to do everything at once. I’ve seen so many lovely projects stall because the committee tried to recreate the British Museum in a drafty church hall. Start by assigning specific roles—you need one person dedicated to the paperwork, one for the money, and at least two people focused on the actual archival research for displays. If everyone is trying to do everything, nothing actually gets finished, and more importantly, nobody is taking the minutes.
When you move into the actual setup, think about the flow of the room. You don’t need a professional budget to master basic exhibition storytelling techniques; you just need to make sure the items tell a coherent story. Instead of just laying out old photographs, try to group them by decade or by a specific street name. It helps people find their own connection to the past. Also, please, for the love of all things organized, keep a folder of every decision made regarding the layout. If your committee changes next year, the new folks won’t have to start from scratch.
Common Mistakes to Avoid
The biggest mistake I see—and I’ve seen it happen in dozens of parish projects—is trying to do everything at once. People get so excited about the big opening day that they forget the heavy lifting of archival research for displays. They end up with a collection of lovely old photographs but no context to explain why they matter to the people walking past. If you don’t spend that quiet time in the local records first, you aren’t really telling a story; you’re just displaying old paper.
Another trap is the “more is better” fallacy. I once worked with a group that thought a packed room meant a successful event, but they had completely ignored engaging museum visitors through clear paths and breathing room. They crowded the tables so tightly that people couldn’t actually see the items, let alone read the descriptions. Don’t let your enthusiasm crowd out your audience. Keep your selection tight, your labels legible, and remember that a small, well-told story is always more powerful than a cluttered room of things no one understands.
Final Thoughts
At the end of the day, don’t let the paperwork or the logistics intimidate you. I’ve seen so many wonderful ideas wither away simply because people were too afraid of the “official” side of things. You don’t need a professional curator to start; you just need a group of neighbors who care about the same patch of pavement. Whether you are curating historical artifacts from a local attic or just printing out old photographs, the most important thing is that you actually begin.
As you move forward, remember that the goal isn’t perfection—it’s connection. You might spend weeks on your archival research for displays, but the real magic happens when a resident walks in and recognizes their grandmother’s face in a faded portrait. Keep your committee small, keep your minutes clear, and keep your focus on the stories. If you can document your process as you go, you won’t just be hosting a one-off event; you’ll be building a foundation that the next group can stand on.
Five things I’ve learned about keeping the momentum going
- Don’t try to tell the whole world’s history; pick one street, one era, or one specific family. If you try to be too broad, you’ll end up with a cluttered room and a committee that’s exhausted before the doors even open.
- Keep a “Paper Trail of Decisions.” I cannot stress this enough. Every time you decide on a venue or a budget, write it down in a simple notebook. If you don’t, six months later, half the group will remember the meeting differently, and you’ll spend more time arguing about what happened than actually setting up the displays.
- Recruit a “Treasurer” who actually enjoys spreadsheets. You don’t need a chartered accountant, but you do need someone who won’t lose the receipts for the tea and biscuits. A history exhibition is only as good as its ability to pay for the printing costs.
- Use what you have in the cupboards. People get caught up in wanting professional-looking mounts and expensive lighting, but a well-placed photograph on a clean piece of cardstock is often more moving than a high-tech display. Focus on the stories, not the shiny bits.
- Build in a “Handover Plan” from day one. The biggest mistake small groups make is working themselves into a frenzy for one event and then simply vanishing. Decide now who will hold the keys and the bank card once the exhibition closes, so the next project doesn’t have to start from scratch.
The Heart of the Matter
An exhibition isn’t just about dusty photographs and old maps; it’s about making sure the people who built your street feel seen, and more importantly, making sure you’ve actually written down the process so the next group doesn’t have to start from scratch.
Deborah Castellanos
A Final Word Before You Begin
Looking back at everything we’ve discussed, it really comes down to the basics. You need a small, dedicated team, a clear way to track your pennies, and a sensible plan for how you’re actually going to display those old photographs and documents. It is easy to get bogged down in the “what ifs” of venue bookings or insurance, but if you focus on keeping your records straight and making sure everyone knows their specific role, you’ll avoid most of the headaches that sink smaller projects. Remember, a well-organized committee isn’t about bureaucracy for the sake of it; it is about creating a stable foundation so that the history itself can take centre stage without being overshadowed by administrative chaos.
At the end of the day, a history exhibition is about more than just dusty archives or old maps; it is about helping your neighbours see themselves in the place they live. When you finally pull back that curtain and see someone’s eyes light up because they recognise a shopfront from their childhood, you’ll realise why all the paperwork was worth it. Don’t wait for the perfect moment or a massive grant to arrive. Get your six people together, find a small space, and start making history happen. You might just find that preserving the past is the very thing that brings your community closer together for the future.
